First connection
Before You Begin:a. This socket can only work on a 2.4 GHz WIFI network. Check your networkb. You will need a computer with a wifi connection to configure the socket.vs. Write down the password (security key) of your wifi.d. Be prepared to write down the IP address that will be provided to you during installation.
1. Plug the smart plug into the mains.
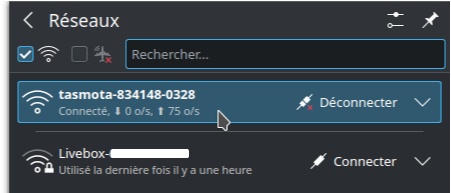
2. Access the available WIFI networks on your PC. You should see the access point “tasmota-xxxxxxxx” appear, if the access point is not detected, you must reset your socket, see Reset section at the bottom of the page.
3. Connect to the “tasmota-xxxxxxx” hotspot

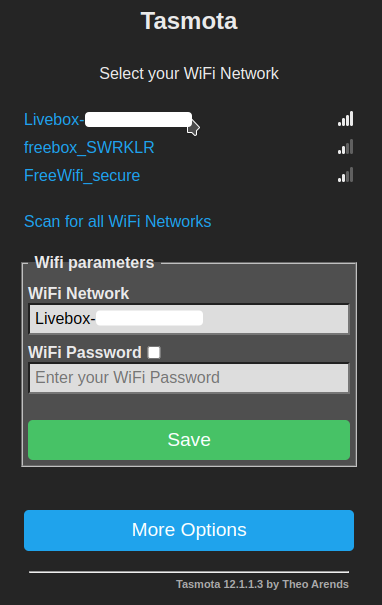
4. After connecting to the access point, go to your internet browser and enter the IP address: 192.168.4.1 in the top search bar. You should see the page appear:

5. In this page:
- a/ Select your personal network by clicking on it. Your network should appear in “WIFI Network”.
- b/ Enter the Security Key of your network in the “WiFi Password” field.
- c/ PREPARE SOMETHING TO NOTE then click on “Save”
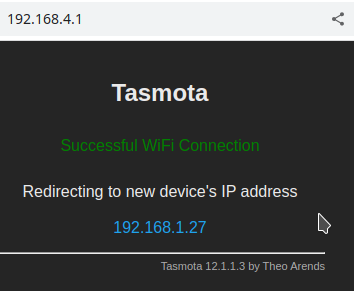
- d/ ATTENTION: Immediately note the IP address that appears on the following page:

6. On your PC, reconnect to your personal WiFi network.
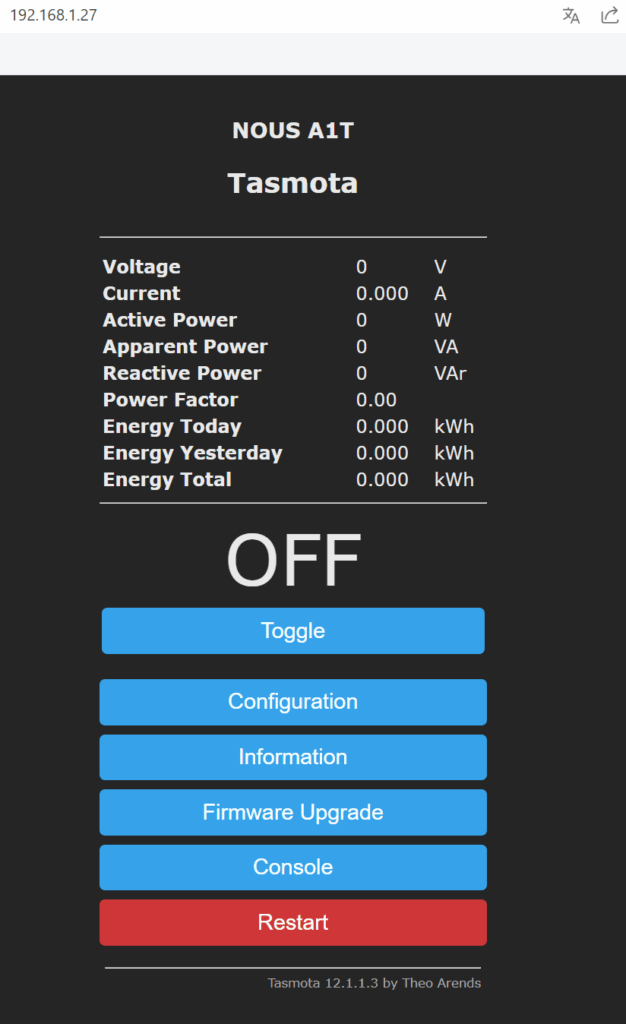
7. On your browser enter the IP address of the socket you noted. You should see the page appear:

8. Immediately test your outlet by clicking the “Toggle” button, it should turn on or off.
9. The smart plug is ready to use. The template and rules are already enabled, but if you need them later, you can find them below.
In the official documentation you are invited to calibrate the device for the power source. You can find how to do this here: https://tasmota.github.io/docs/Power-Monitoring-Calibration/ . I didn't need it.
Resetting an outlet
Ideally plug the Tasmota socket into a power strip fitted with a switch to switch between on and off 6 times and leave it on for the 7th time, the LED should start to flash, this means that the socket is ready to be initialized .
